|
4 Degree Timing Mod By Blacktop |
|
Well, I finally got a bugaboo up my butt the other day and decided to do the Timing Mod. I headed out to the dealer early in the morning and picked up 3 quarts of oil, a filter, and a right side case cover gasket. It was time to change the oil anyway so might as well kill a couple o' birds with one stone! However, I had always planned to change the clutch springs while I was in there too, but that'll just have to wait for later.
Credit for this mod goes to Spiderace. His version of the mod (the original version) is on this site, HERE. You can also visit his site, where this mod and many others are displayed for your edification, at www.hometown.aol.com/spiderpierce1/myhomepage/motorcycle.html. The timing mod is actually quite simple and easy to do. Just take you time and pay attention, and you have it done in no time. What follows below is how I performed the surgery. |
Click a thumbnail to enlarge
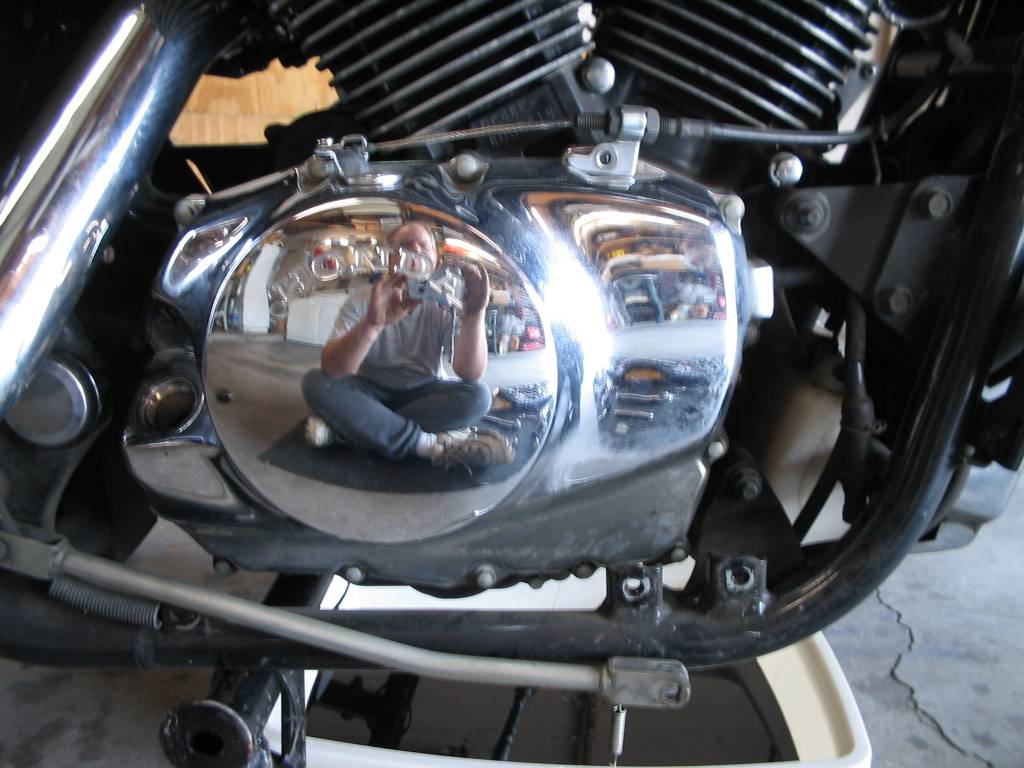
| The area of operation, the right side engine case cover. Note that I have removed my Jardine Forward Controls, and the front pipe of my V&H Cruzers. You'll want to do the same with whatever YOU have bolted on there. Notice the drain pan with black stuff in it. That is oil. You'll want to drain the oil from the engine before you take the case cover off. Unless you want to just drain the oil real fast when you remover the case cover. All over the floor. |
 |
|
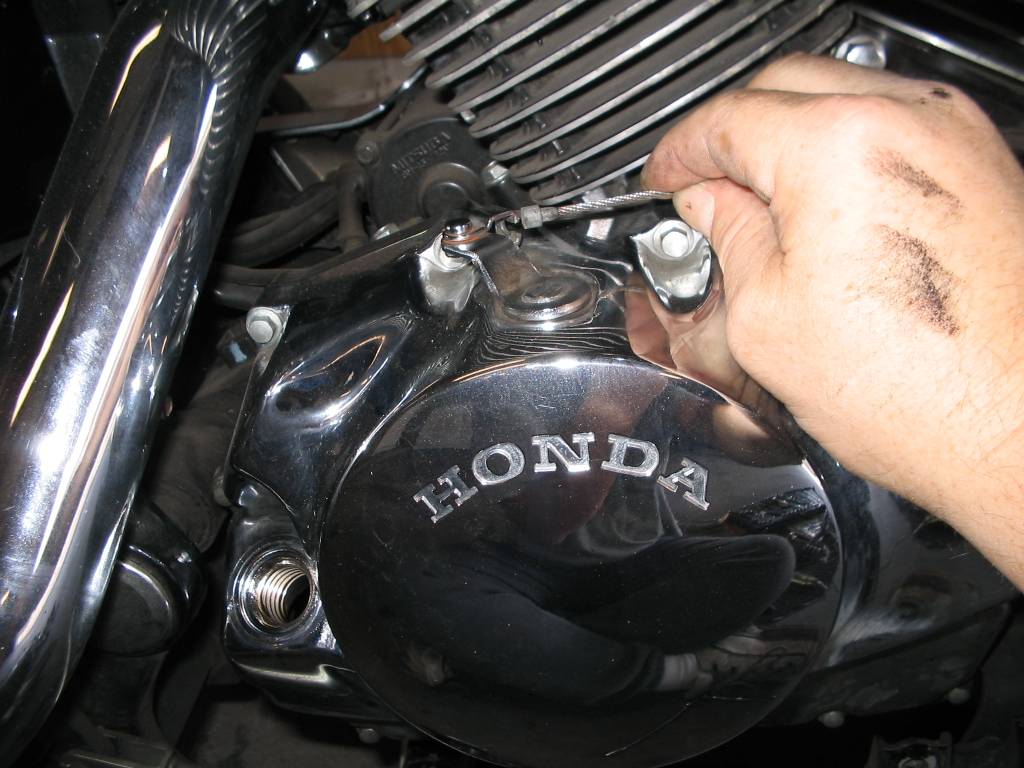
After draining the engine oil and removing your right side foot controls and exhaust (if necessary), you'll need to detach the clutch cable from the engine case. Remove the case cover bolt that holds the clutch cable bracket to the case, which you might notice in the previous picture (the bolt is missing), to gain the room to detach the clutch cable from the clutch lever connector. |
 |
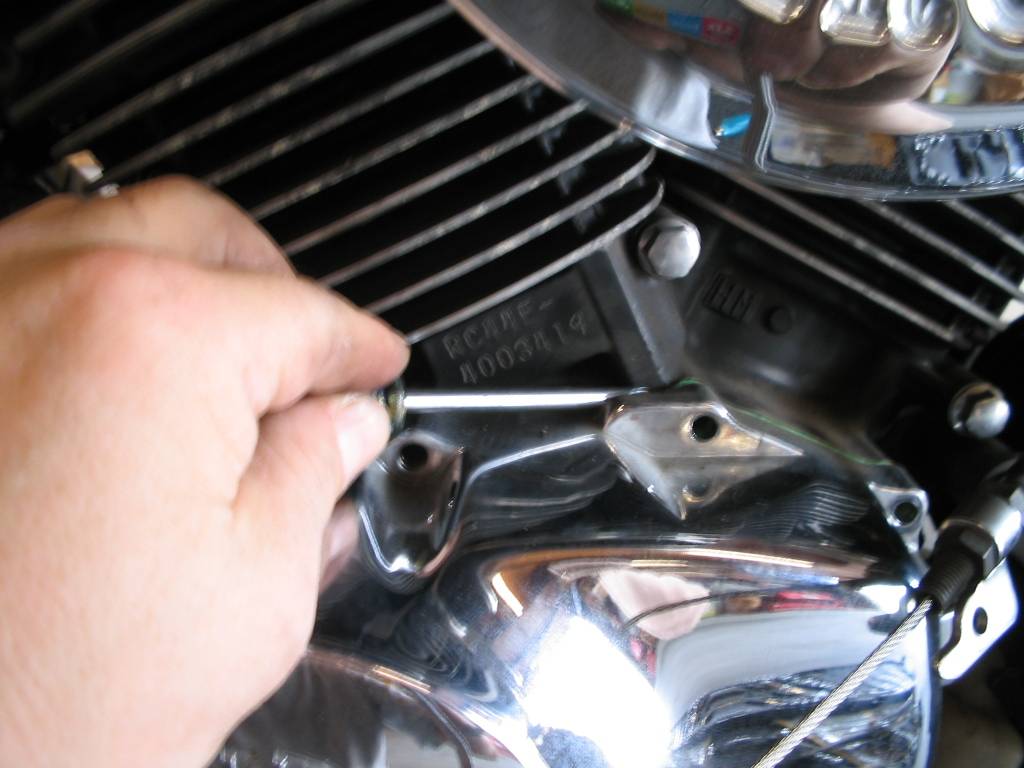
| Use a small metallic lever to pry the case cover away from the engine as shown. Honda has provided and nice "prying tab" for just such a purpose. Just a small amount of pressure and top of my case cover popped right away on the top portion. Once the top is pried away, grab the case cover with both hands and pull straight out and away from the engine (there are locating pins fore and aft, so you need to pull straight out towards you). |
 |
|
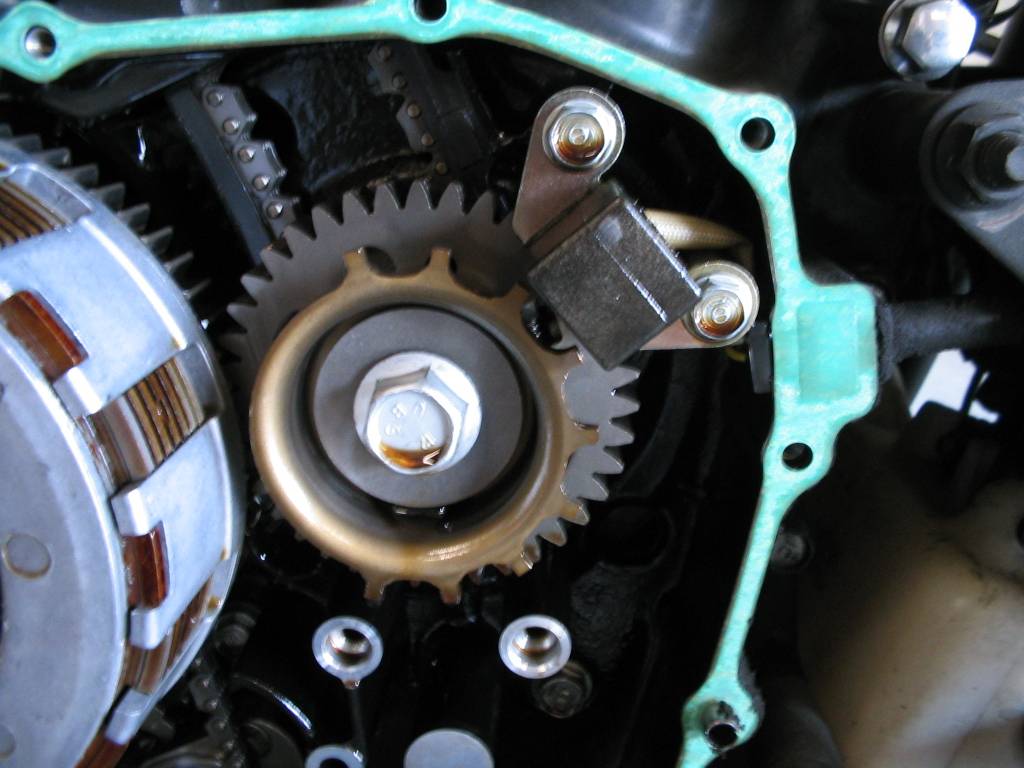
Now that you have the case cover off, you can see the "innards". Our theatre of operation is the upper right quadrant. Although my camera decided to focus on something other than our subject, notice the green gasket on the engine case, which you'll see a little more of as we go on. It is in pristine shape, so I decided to save $15 and reuse it instead and scraping it off and putting the new one on. |
 |
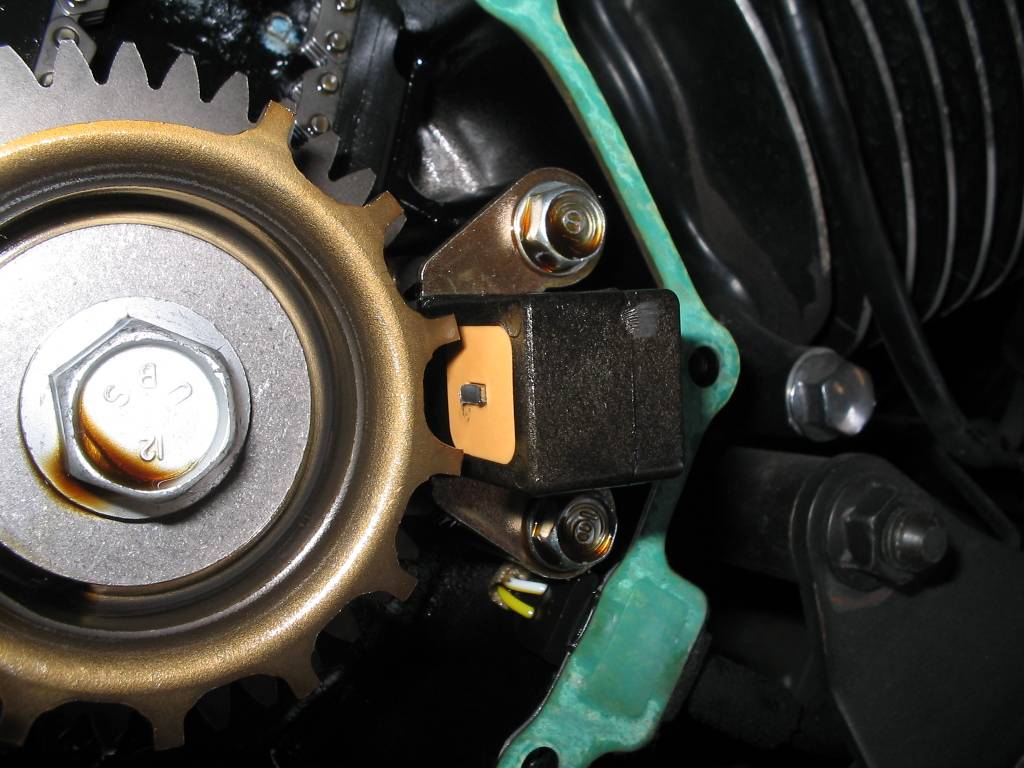
| A closer shot of the upper right quadrant. Notice there are two bolts that hold the magnetic pickup to the engine case. Remove them. |
 |
|
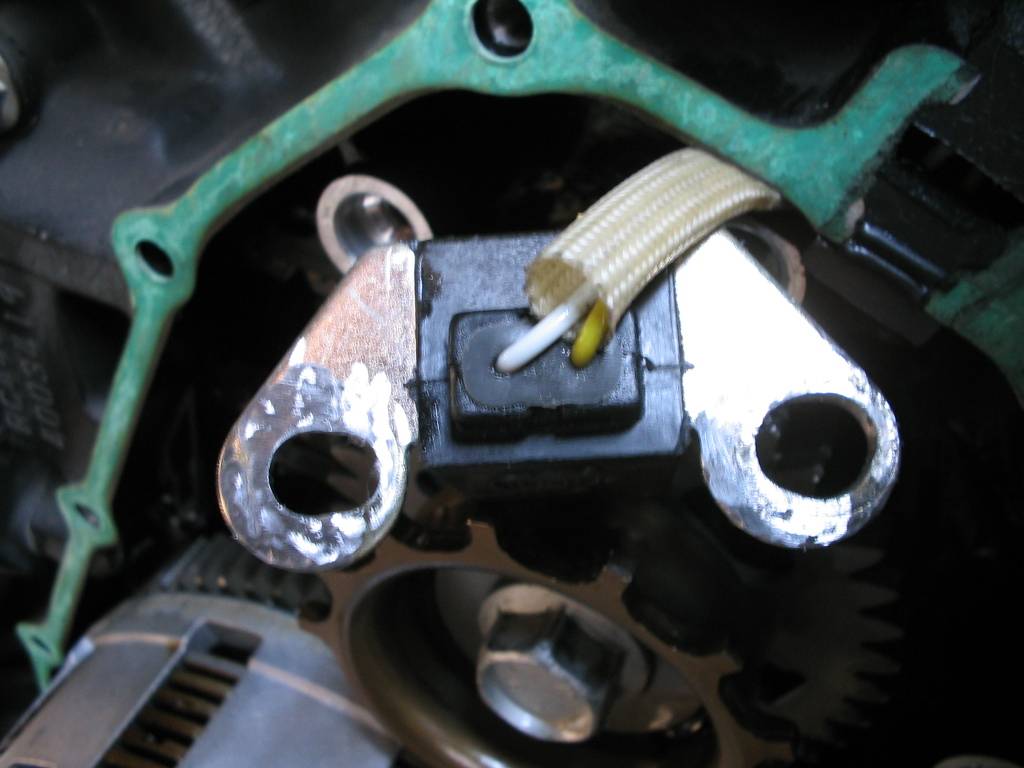
An even closer shot of the magnetic pickup. Notice the little thingy sticking out of the pickup that actually senses the teeth of the "trigger wheel" as it spins. There are 9 fingers on the trigger wheel that the magnetic pickup senses. Nine. Why? I don't know, he's on third, and I don't give a darn. |
 |
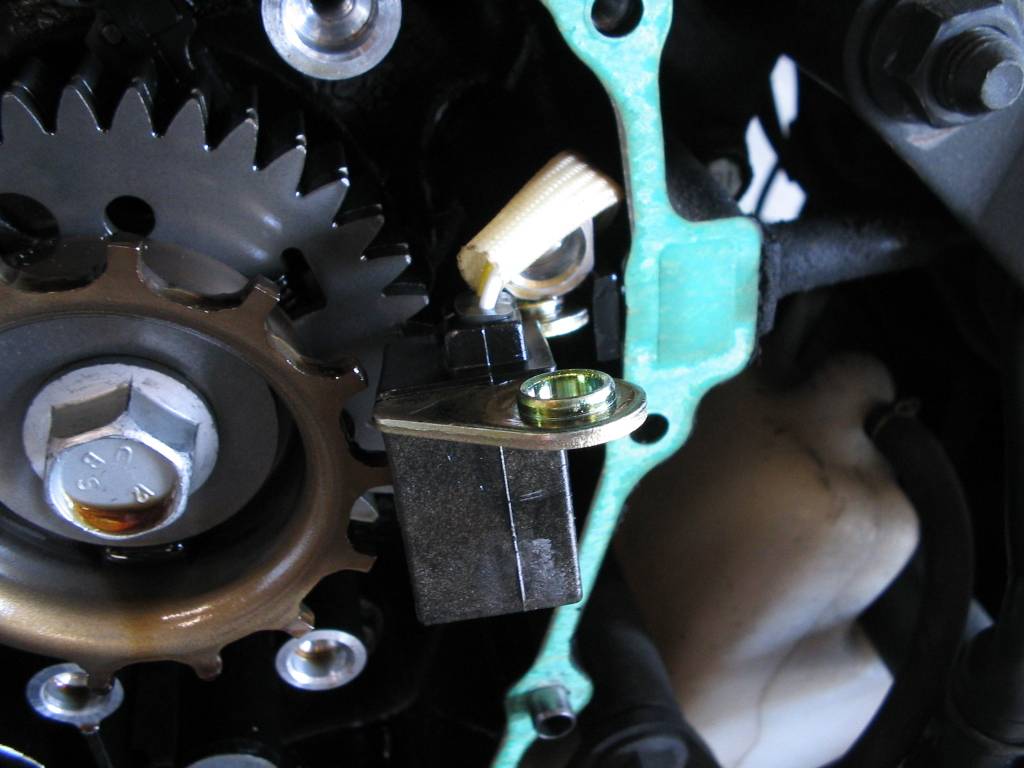
| The magnetic pickup removed. Notice the hubs that center the pickup tabs in the mounting holes. You are going to grind these off. Also notice the green gasket, and the tab that covers the area where that wires from the pickup pass through the engine case through two rubber grommets. After reading Spiders instructions, it seemed like a lot of hassle to remove the pickup and it's cable from the bike, so I just pulled the grommets through the gasket. The tab tore away clean, so I placed it aside to reuse when reattaching the case cover. This allowed me to hold the pickup in my hand while I carefully ground the hubs off of the mounting tabs. |
 |
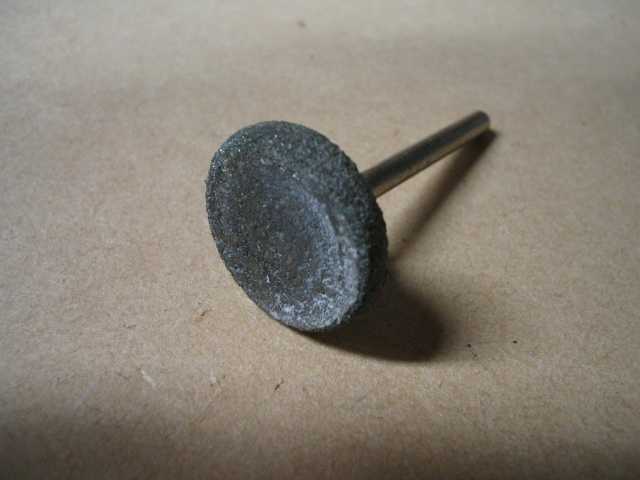
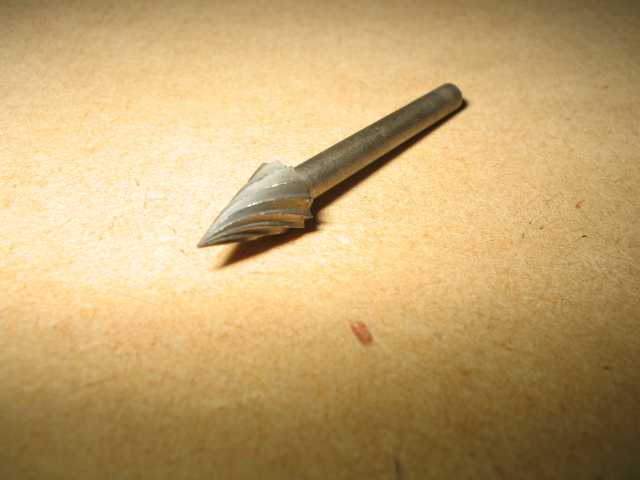
| This is the Dremel bit I used to grind the hubs off. I hung a towel over the engine case while grinding. |
 |
|
Grinding done. Two items of note: the metal will get quite toasty while grinding, so go at it in spurts. I would stop after a few minutes and wet the tab I was working to help it cool down before I would start grinding again. Also, being magnetic, ALL the filings will want to stick to the pickup, so make sure you clean it real good before you bolt it back into the case. |
 |
| This is the Dremel bit I used to elongate the mounting holes. I hung a towel over the engine case while elongating. |
 |
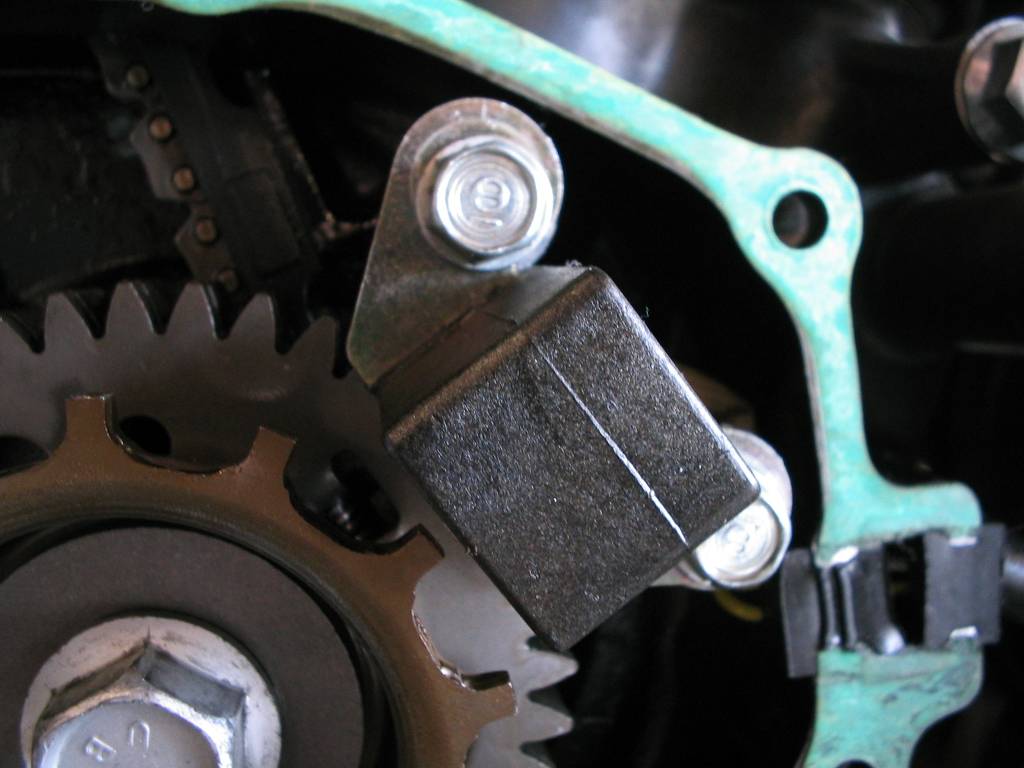
| Elongating done. What we are trying to accomplish here is to elongate or "slot" the bolt holes on the mounting tabs to allow us to shift the position of the pickup just a small amount to the left. That's why we slot the mounting holes to the right. right and left being relative to the mounted position of the pickup as you see it in the case, or in the previous pictures. This causes to ICM to receive it's "spark" signal just a tad earlier than normal. Apparently, about 4 degrees earlier. You don't have to cut away a whole lot, as you want to leave enough mounting tab for strength, and the bolt will hit the plastic pickup at some point anyway. |
 |
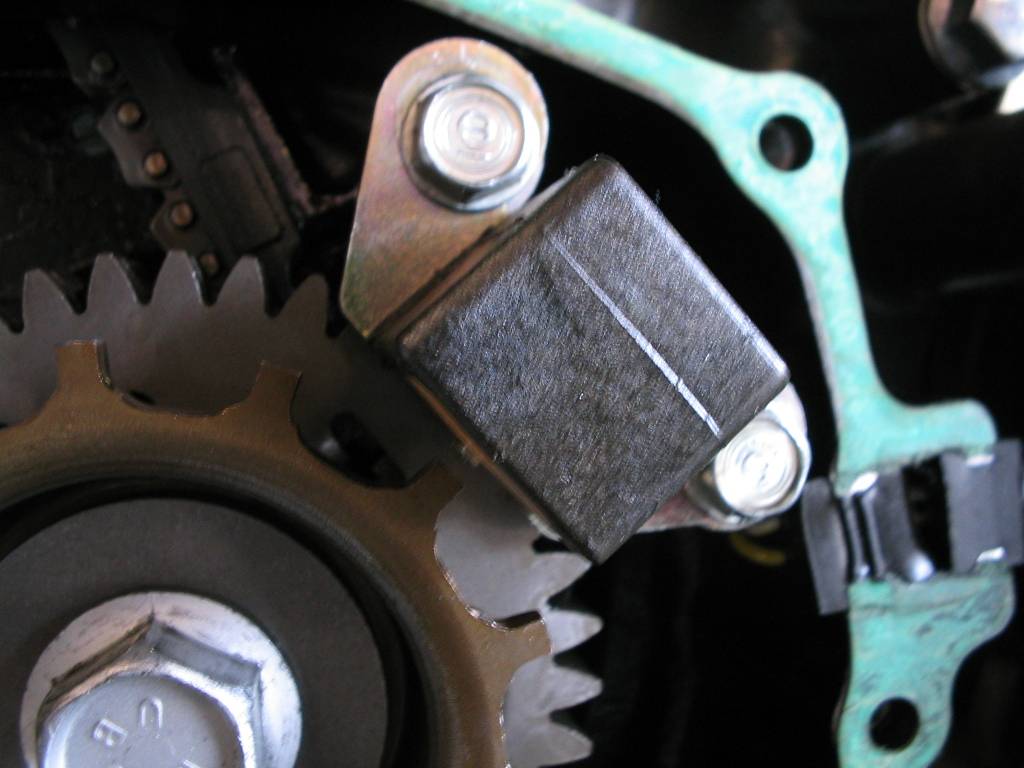
| Pickup remounted in case. Notice that you can see the previous mounting position by the ring impressed on the mounting tab by the bolt. this shows the relatively small amount I have moved the pickup to the left. |
 |
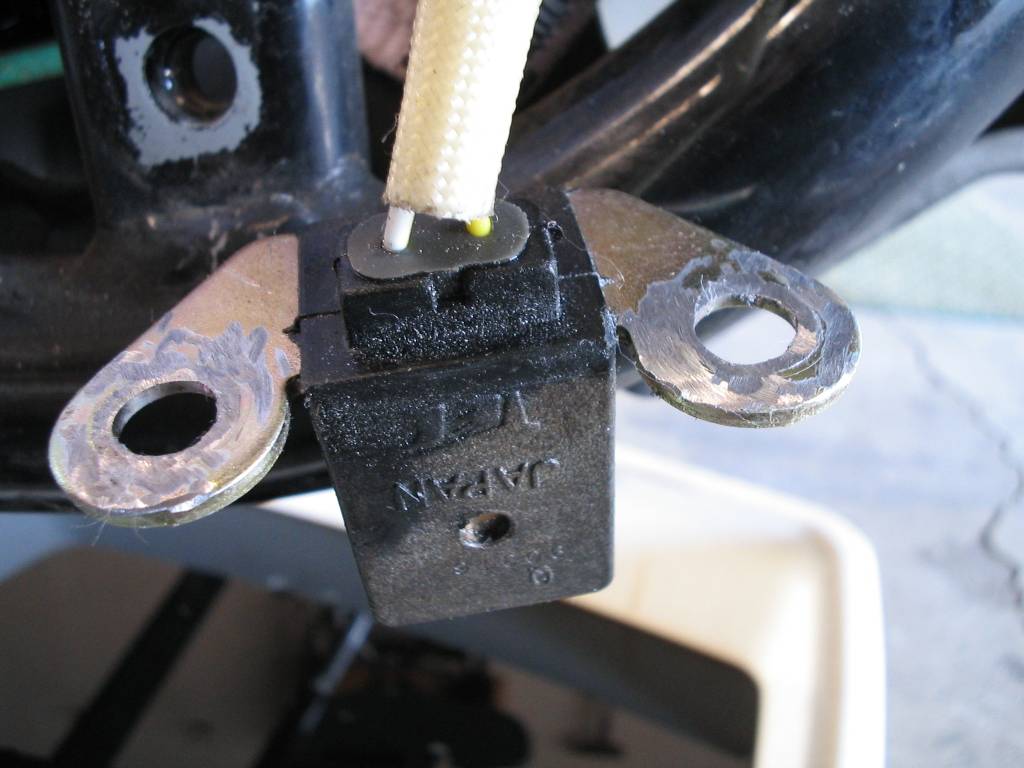
| Mention is made of how close the pickup should be to the trigger wheel fingers. Just take note of this small distance before you start, and recreate it when remounting the pickup. Not too close, not too far. |
 |
|
Now we come to the issue of remounting the case cover. As I decided to reuse the existing gasket, I just put a little dab of oil on the small piece that tore off over the grommets, set the case cover in place, and pressed it on. More on that anon.
2000 and earlier bikes have the gasket. 2001 and later use a liquid gasket. You can buy liquid gasket (comes in a tube) under a variety of names. I only have a bit of info for you as I did not use it. You are looking for a variety that is heat and oil resistant. After applying a layer to the edge of the cover, wait for it to become tacky, then install the cover. Just follow the application instructions on the tube. You can also just order the gasket for the 2000 and not deal with liquid gasket. Next comes the issue of bolt tightening. Many have reported stripping one ore more of the cover bolts, and I think I remember some having broken. I had no trouble with mine. I did it like this: Insert all bolts into all holes and spin them in with your fingers. Begin tightening by just snugging them in a criss cross pattern, as with a wheel on your car. I gave them a snug in this manner, then began to tighten in the same pattern, trying to recreate the amount of torque I felt when taking them out. Be gentle. Crank too hard and they will more than likely strip. So far, I have not had any leaks. The reused gasket is doing it's job! |
 |
|
Now for the results. the first thing I noticed is that it started up with just a touch of the starter, cold. that was a very pleasant surprise. On the road, there is a noticeable difference in how the engine runs. Much smoother, and with a much quicker throttle response. Also, no popping of any kind on decel. and it does feel "zippier". I don't know if it's just my perception, but it does seem to have just a bit more power, and the powerband in each gear is smoother.
I took it to "my" road for a try out. A little place local to me called Turnbull Canyon Road, in Hacienda Heights. It's only about 4 miles long, but it's a pretty intense 4 miles. Twisty as a pretzel, kinda like Mullholland Highway. It felt just fine, Lots of torque and power, and was quite fun to ride. Overall, it was well worth the small effort. |
|