Dial A Jet Install


Ozone Ranger's Dial-A-Jet Installation

Click on a thumbnail to enlarge

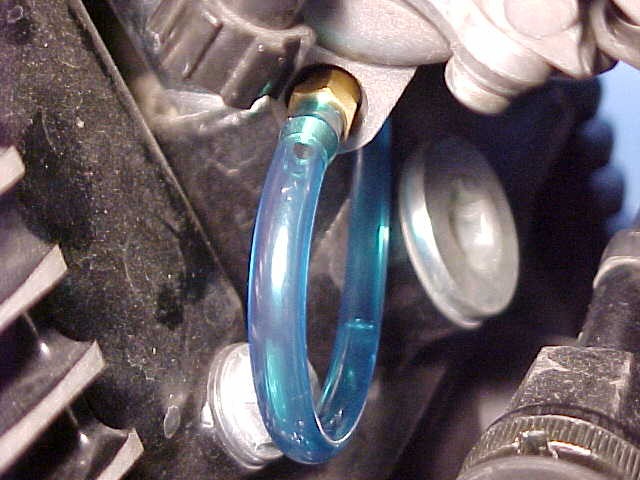
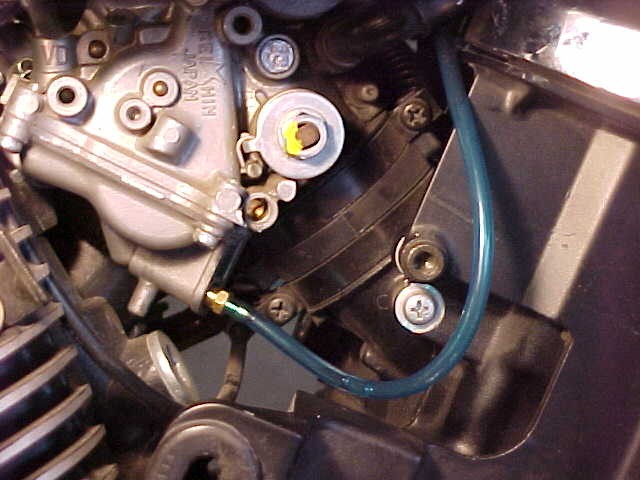
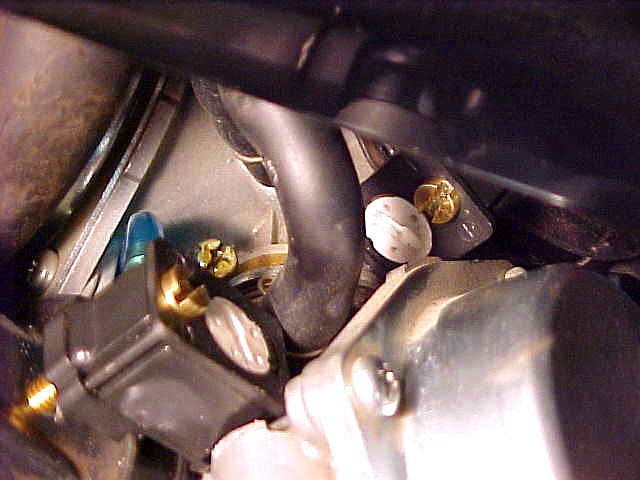
This is the way I installed them, and I got very dramatic results. Not to say this is the ONLY way they can be mounted, but in this way I am sure the critical issues are sure to be met (Fuel feed tube perfectly perpendicular to the air flow, AND the end of the tube (orifice) ends up directly in the center of the cross-section of the circular air feed boot. (no cutting required)).
As you'll see, I did not use the plastic tie-wraps provided, I did not want to mount anything on the curved / bent & thinner sections of the air feed tubes, it would be almost impossible to insure a perpendicular attitude for the fuel feed tube, AND, the brass fuel feed tube would need to be be cut, as the thinner wall would allow the stock brass tube to penetrate WAY past the center of the "circle".
In addition, using the steel bands for the mounting is A LOT more mechanically sound, and stable! It' a no brainer! You just need to drill the small hole in the band for the mounting screw, AND flatten down the rolled up edges of the band in the area where the DAJ block will sit. It makes for a clean, stable, and very functional installation.
Bt there's always more than one way to skin a jet (I mean dial a cat…)
Here goes:

750right.jpg (72790 bytes)     750left.jpg (67593 bytes)     750jets1.jpg (66374 bytes)     750jets2.jpg (65903 bytes)     750adjustments.jpg (58146 bytes)

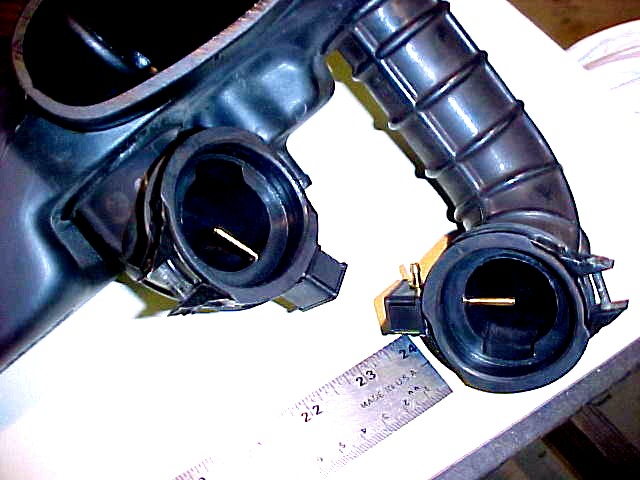
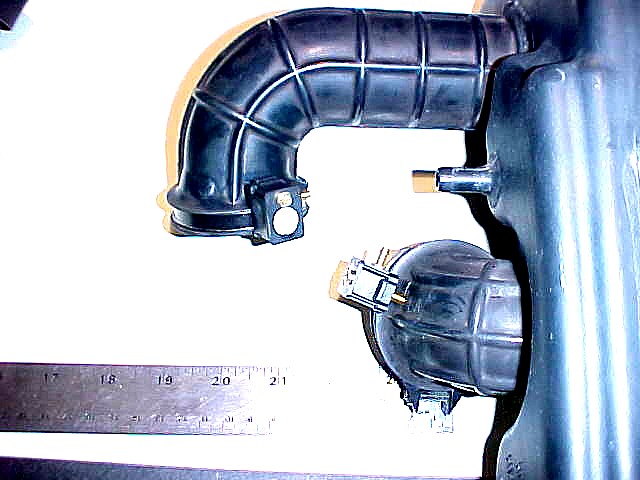
Jets1 and Jets2 shows the air feed boot removed and with the DAJ feed tubes installed. They will NOT fit back into the bike unless mounted in exactly the positions shown! 750 Adjustments shows how the adjustme3nt screws present after installation is complete (tank removed) and the "Left & Right" pictures show what remains visible after everything is put back together.
OR(D).